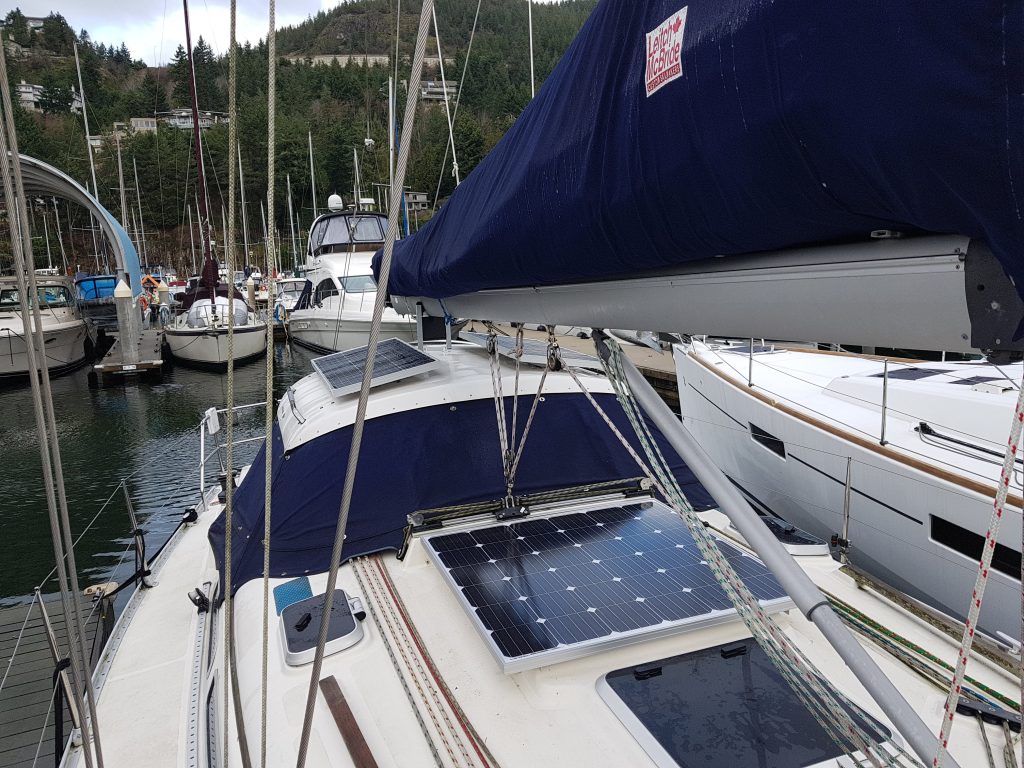
Increasing Solar Capacity by adding a third panel.
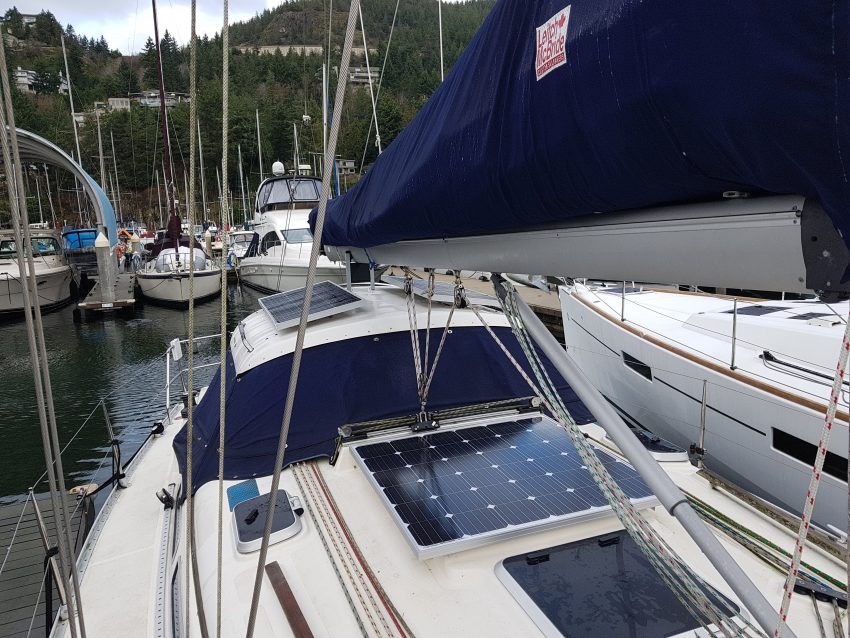
Our Hanse 371 Tangleberry already had 2-100W solar panels on the Tartarooga hard dodger. I wanted to add more solar capacity in hopes of generating enough power to run the autopilot and fridge when sailing.
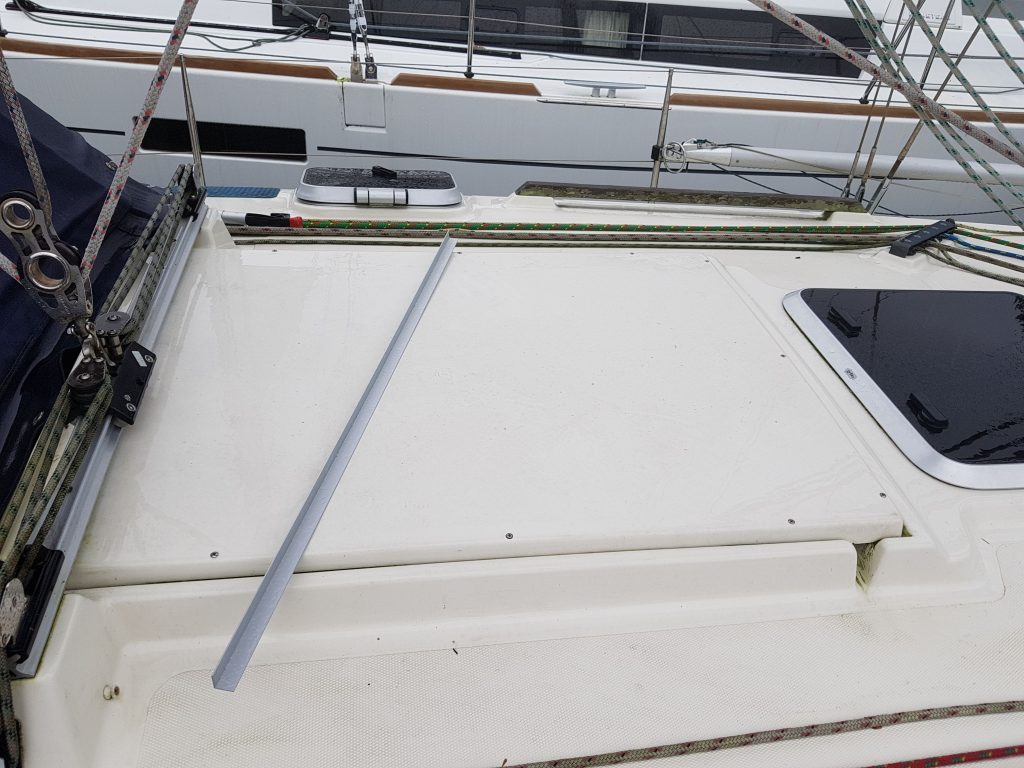
I looked for a suitable mounting location. I didn’t want the expense and windage of an arch. I also didn’t want anything hanging on the lifelines. The only flat area that is not normally walked on is the hatch garage ahead of the dodger. I went looking for the largest panel that would fit comforably in that area. The garage measures about 30 x 38 inches.
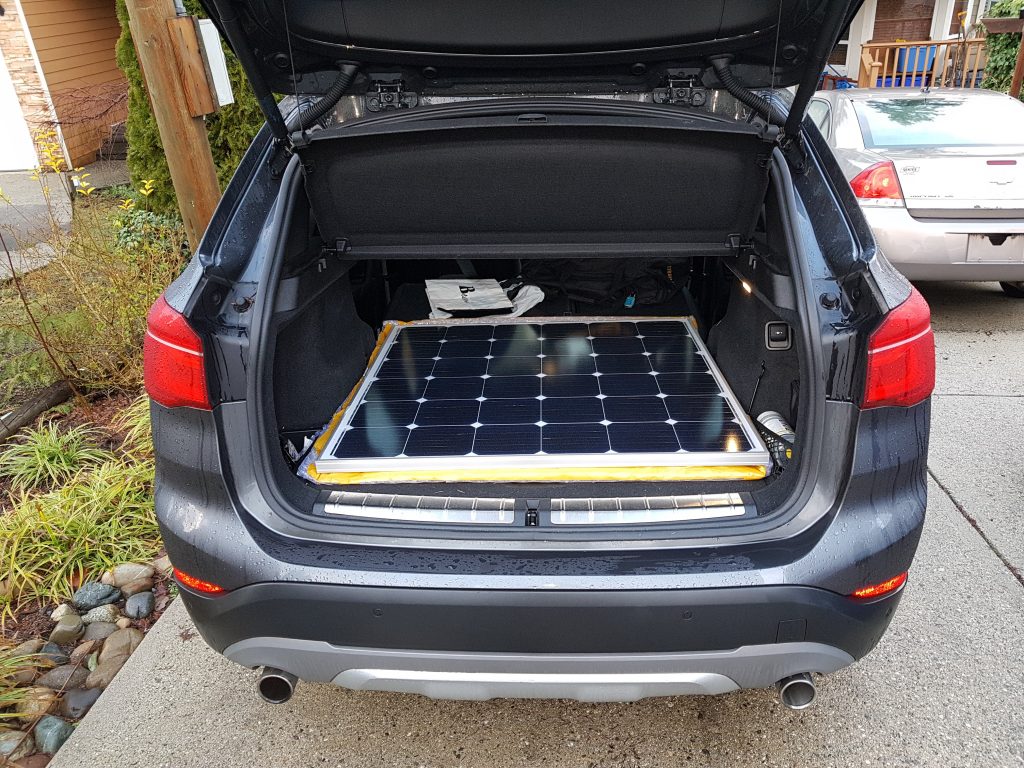
The existing panels are made by Renogy, and I am happy with the quality. However they had nothing the right size. A pair of 100W panels would “almost” fit but would interfere with the opening hatch ahead of the garage. After some Googling I found that Dokio makes a 150 watt monocrystalline PV which is square, measuring 38.75″ on a side. This was the perfect size for the space available. I ordered one from Amazon for $189 CDN including shipping. Although marked as “in stock” delivery took a couple of weeks. The quality of packaging was quite inferior to Renogy’s. Basically a cardboard box, no padding or corner protection. Amazon wisely wrapped the whole box in bubble wrap and it arrived intact.
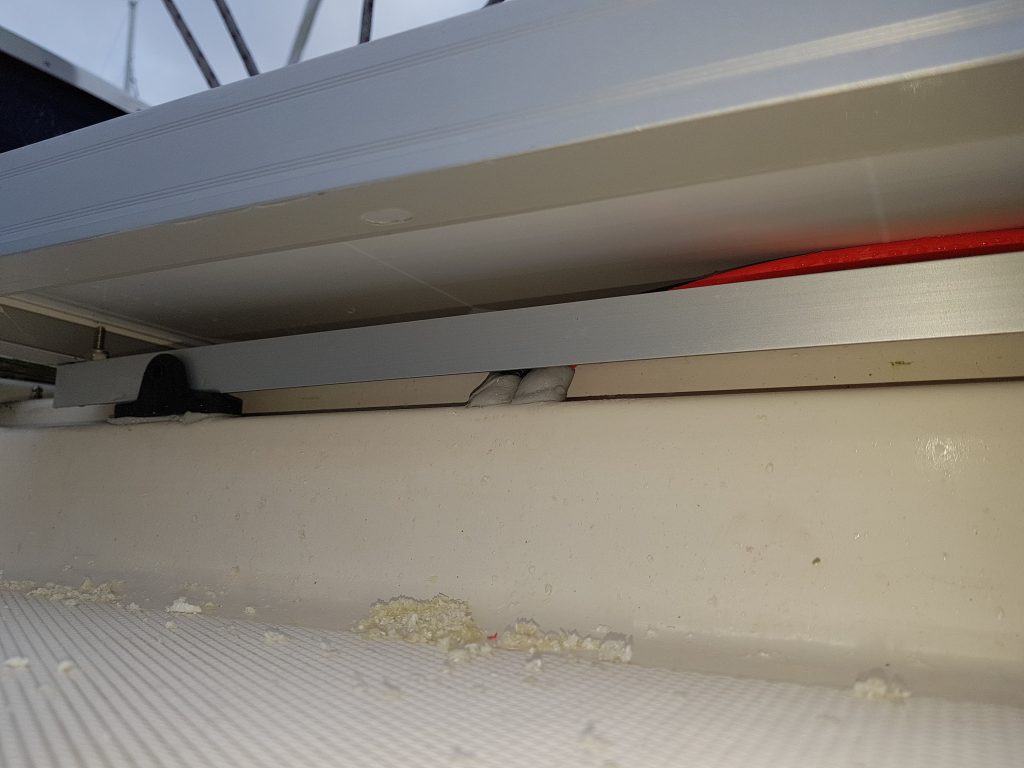
I planned to mount it on the molded in coamings which run down each side of the hatch garage. To this end I bought 4 nylon Bimini top hinges at the local marine store, along with #10 Stainless steel tapping screws to fasten them. The rails are hollow fiberglass about 1/4″ thick. I got 4′ aluminum angles 3/4″ on a side from Home Depot. I mounted the hinge brackets on the coamings, then measured the center to center distance which was 30.75 inches. I cut, drilled, and attached the aluminum angles to the underside of the panel at the correct spacing so they would drop into the slots in the hinges.

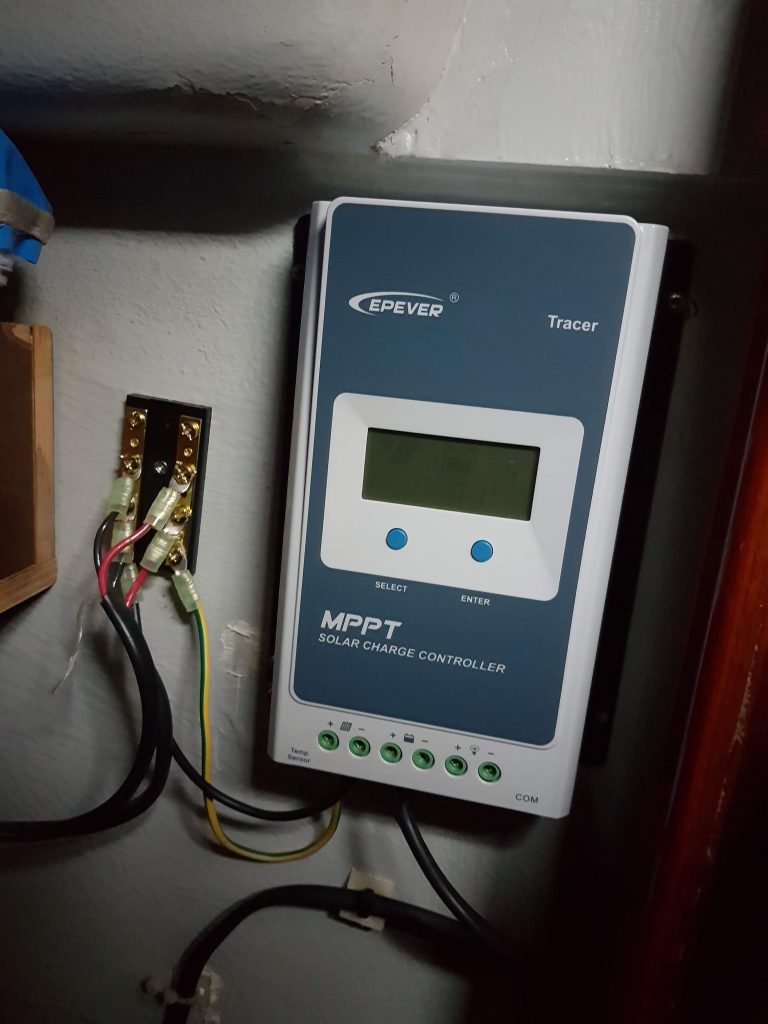
I also purchased a 20 ft. Wiring Harness with connectors. The #10 wires were thicker than I expected. Before I installed the panel I drilled two 5/16″ holes for the wires on the starboard side between the two brackets. Down below I partly removed the head liner and fed the wires through. I sealed the holes with butyl tape, which I also used as bedding for the brackets.
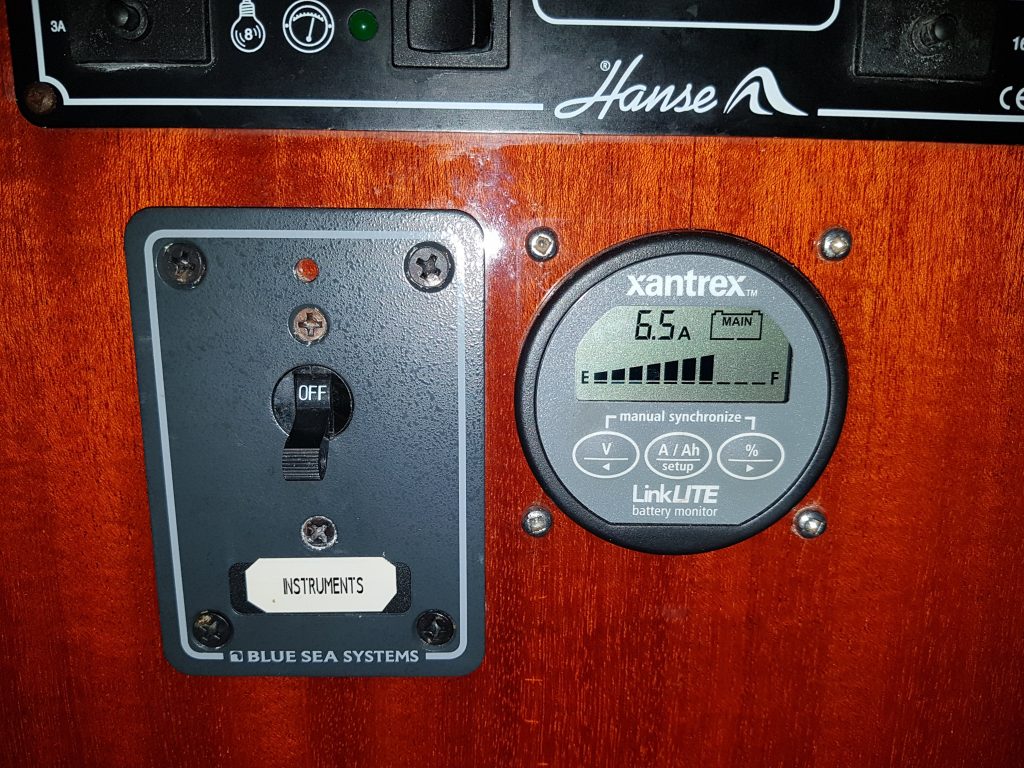
Once everything was mounted and connected I tested the unit on a bright cloudy day. The solar output was between 5 and 7 amps at about 13 volts. This is 80 to 90 watts, about 25% of a rated 350 watts. I think this pretty good for midwinter at latitude 49.5 North! I doubt we will ever see the full output as at least one of the three panels is likely to be partly shaded even in mid summer. I am hoping for 75 to 100 amp hours in summer which would cover all our needs at anchor, and come close to our needs at see with the instruments and autopilot on. I will follow up in June or so,
Update Feb. 10, 2020
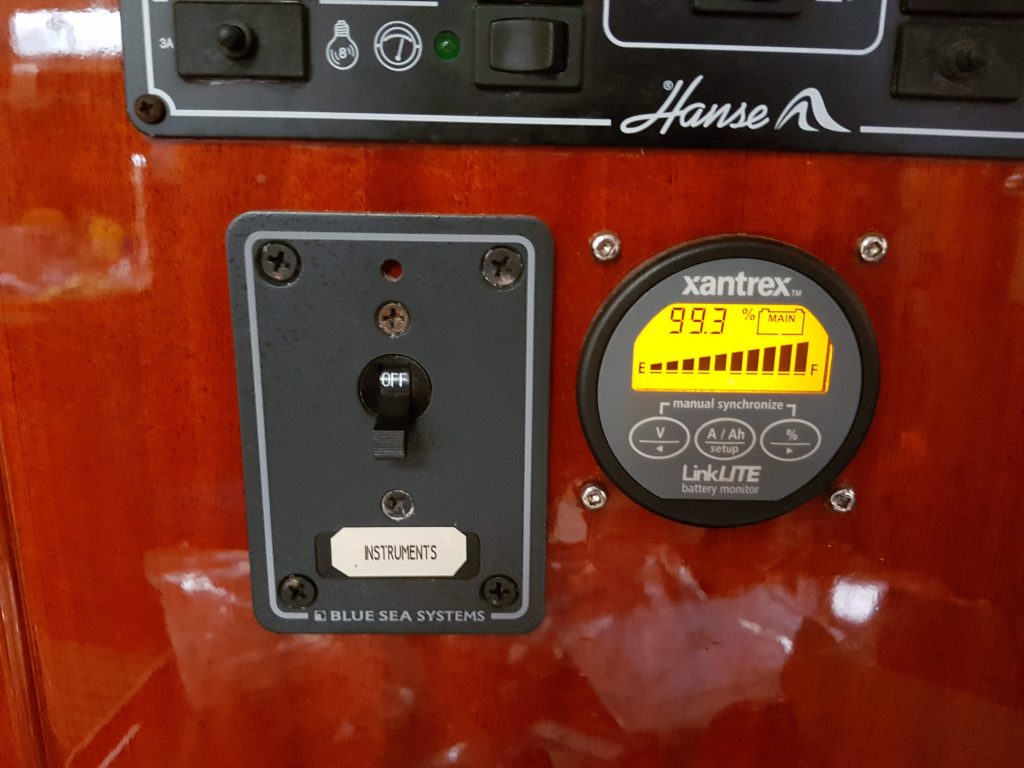
After a week with no shore power charger connect the house batteries are fully charges. They were at about 90% last week. This is amazing in Vancouver in the winter. Because of the boat being moored beside boathouses, direct sun only happens late in the day. I am now confident I will be able to run the fridge on solar when warmer weather comes.
1 thought on “Solar Part 2”