Or how to turn a small job into a big one…
I recently found from MyHanse.com out that my Hanse 371 has a large void under the vee-berth, below the water tank. Storage on a sailboat is always at a premium, so I determined to make use of the area.
I was a little nervous about cutting the first hole, so I started small with a 4″ round access panel. It was a quick job to install, as I used a hole saw to make the cut in the liner. The main surprise was how thick the liner was. 8 mm, thicker than the hull on may boats. It was even thicker at the bottom where it was very solidly glassed to the hull. This boat is built like a battleship!
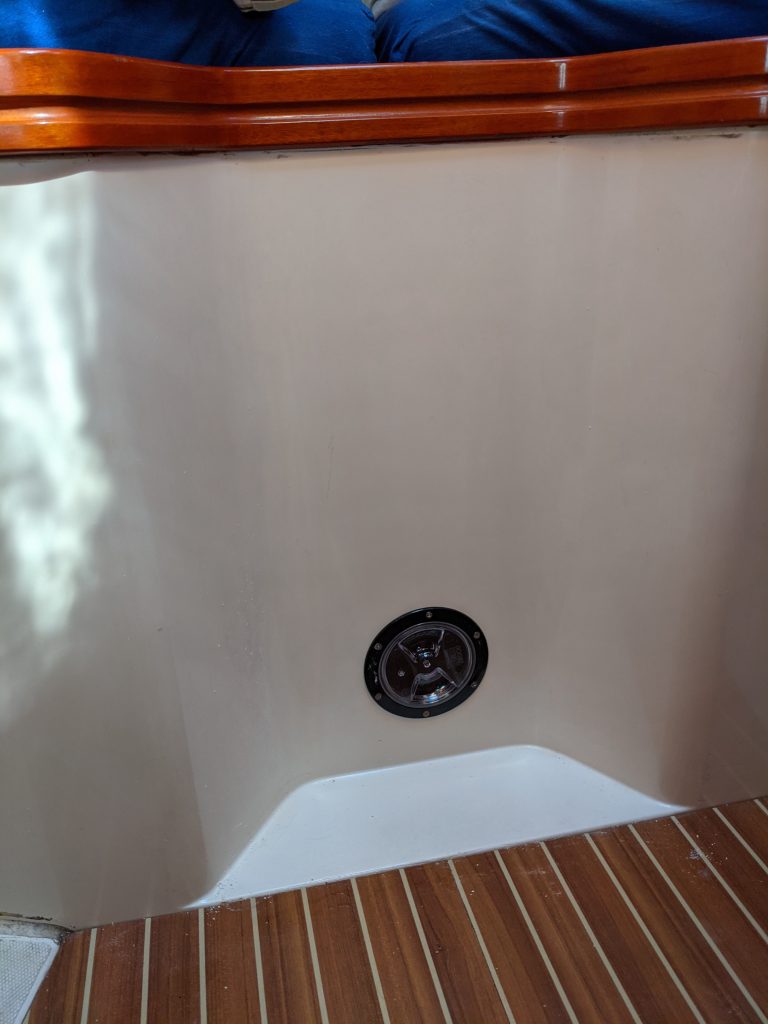
This proved to be far too small. I could fit my arm inside, getting an idea of how much space was available. I could barely reach the next bulkhead, and I could not feel the sides of the compartment. Not much was visible through the hole.
I decide to enlarge the opening, and purchased this panel from Amazon. When it arrived, I was dismayed with how flimsy it was, and how tiny the catch was. I doubt if it would last a week once installed. Returned.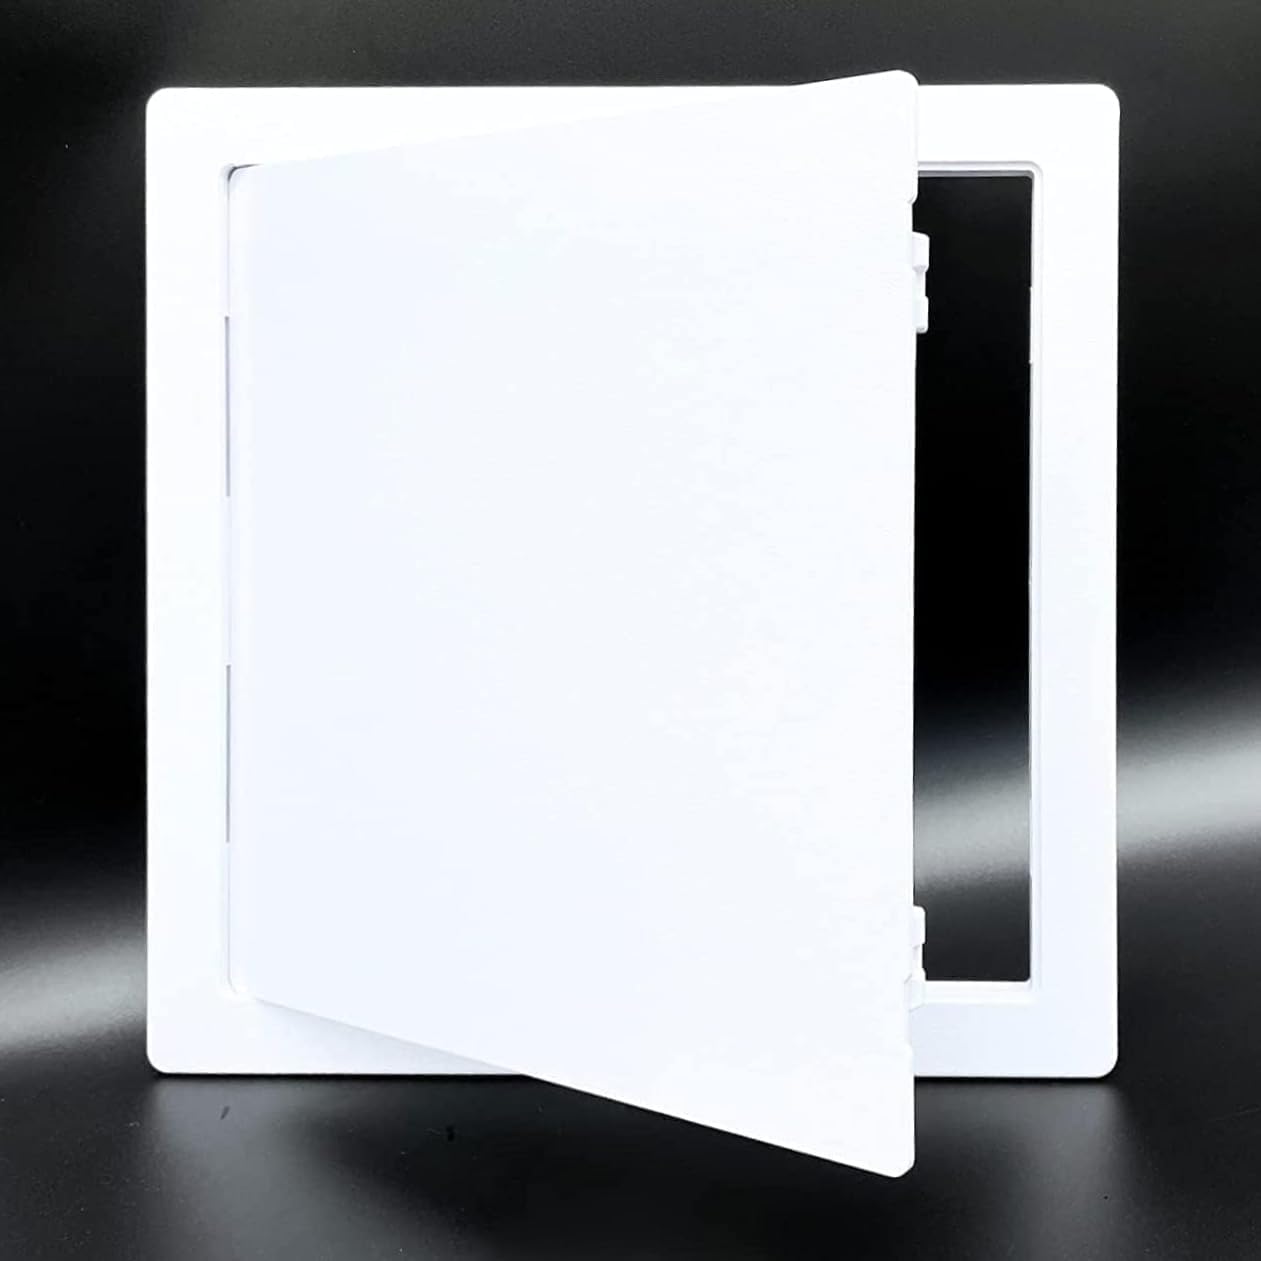
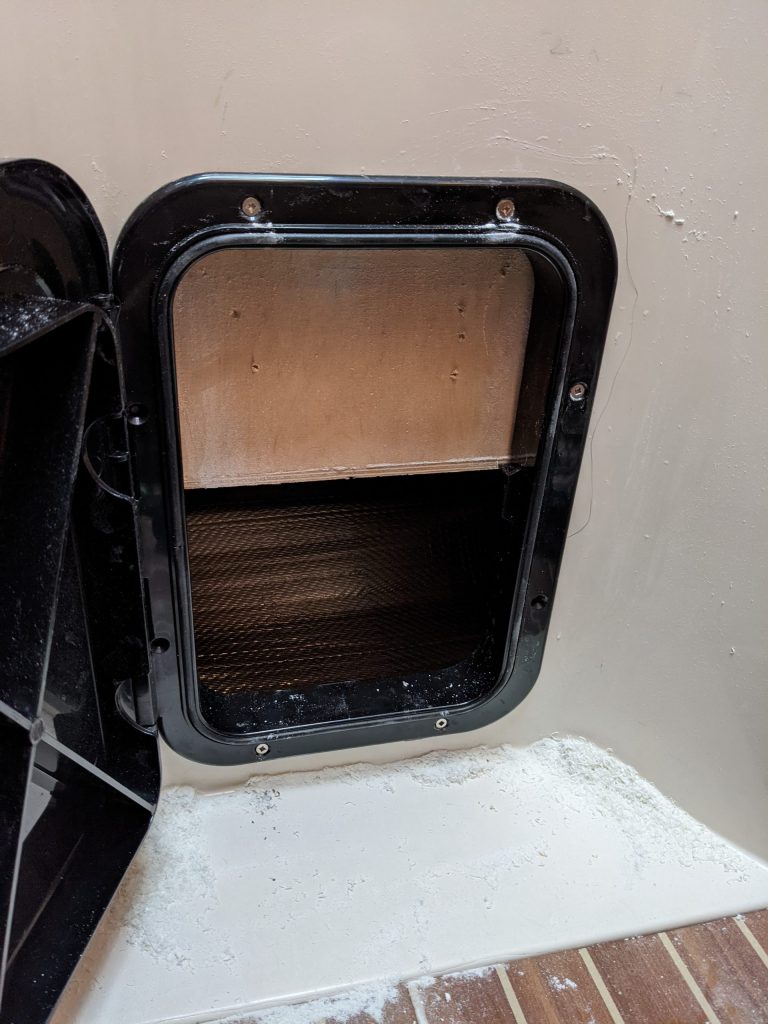
Then I searched again, for something more substantial. There were lots of waterproof access hatches available, but most were too large for the space I had available. I finally ordered this one:
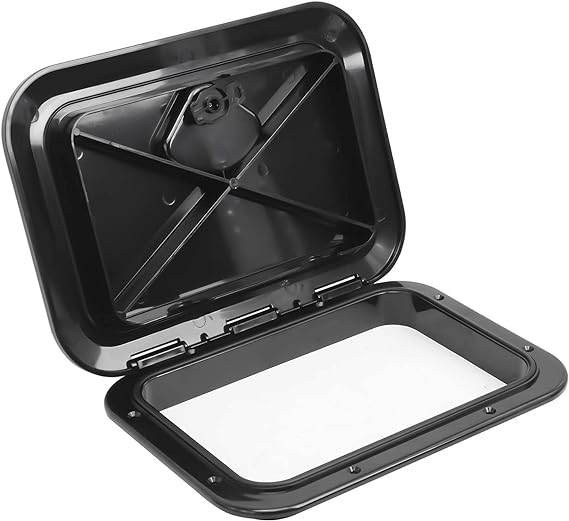
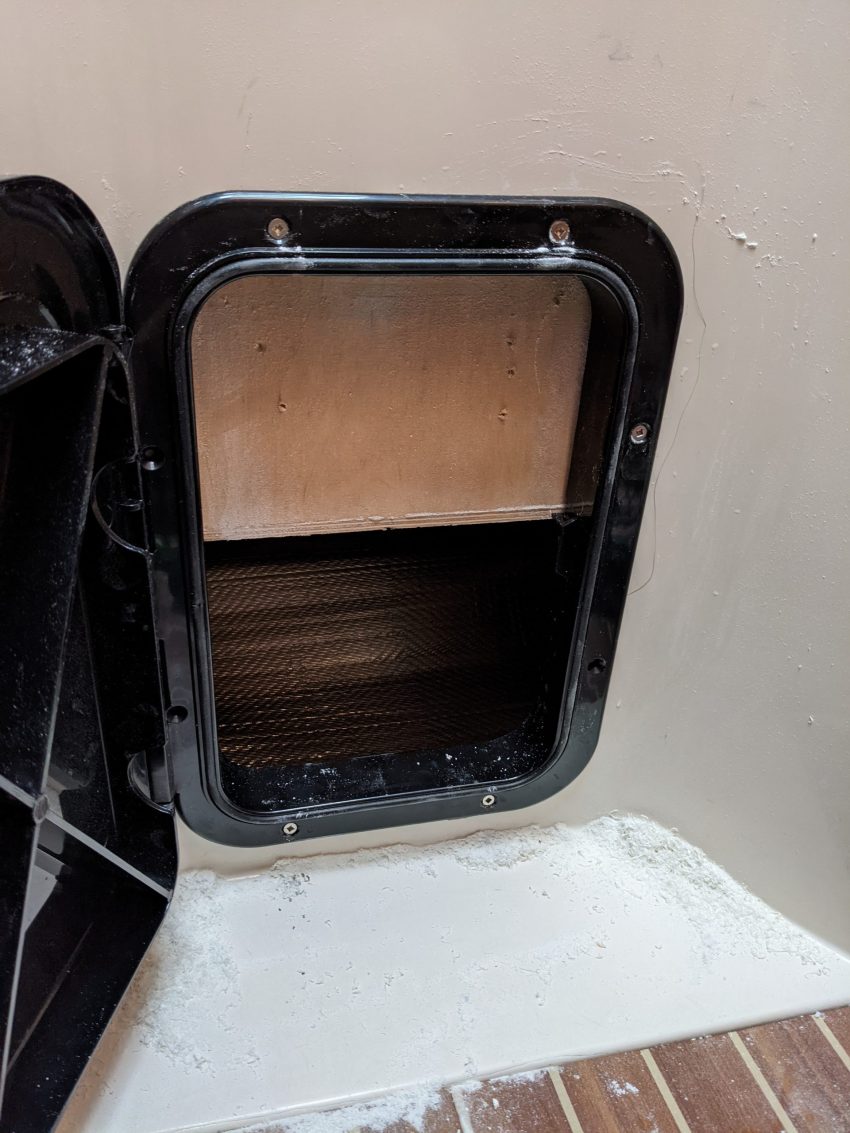
It was bigger than required, but would fit. The quality is excellent, and I’m confident it will last a very long time. The waterproof seal in not needed in my application, but it couldn’t hurt, and it will never rattle.
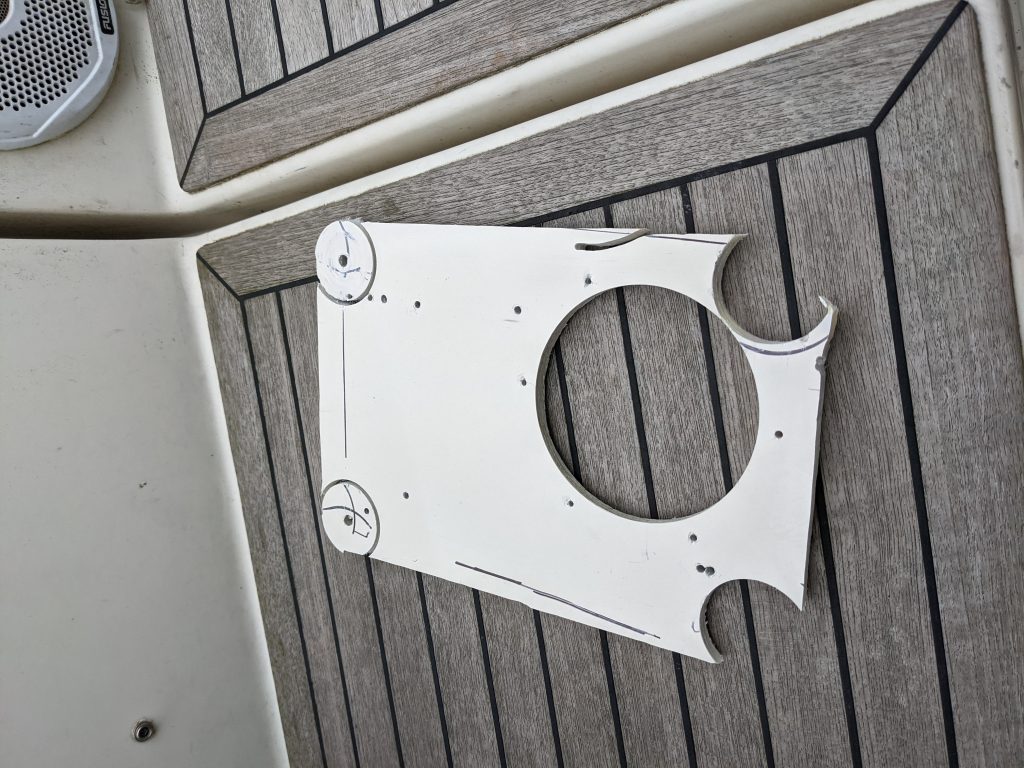
I wanted to do a neat job of cutting the hole for it. In truth, the mounting flange is wide, and you could do a fairly sloppy job of cutting, and it would still look alright. Before you stop reading here, I should mention that in this case, a jigsaw would not to the job, because at the upper part of the opening the mounting of the water tank is very close by. The jigsaw blade would hit it.
The tool I had that best fitted the job was a Rotozip saw. It is not my favorite cutting tool because it is very hard to control by following a line. I worked out a strategy, consisting of cutting the corners with a hole saw (2″ radius was the closest to the actual shape that I had) and using the Rotozip for the straight lines.
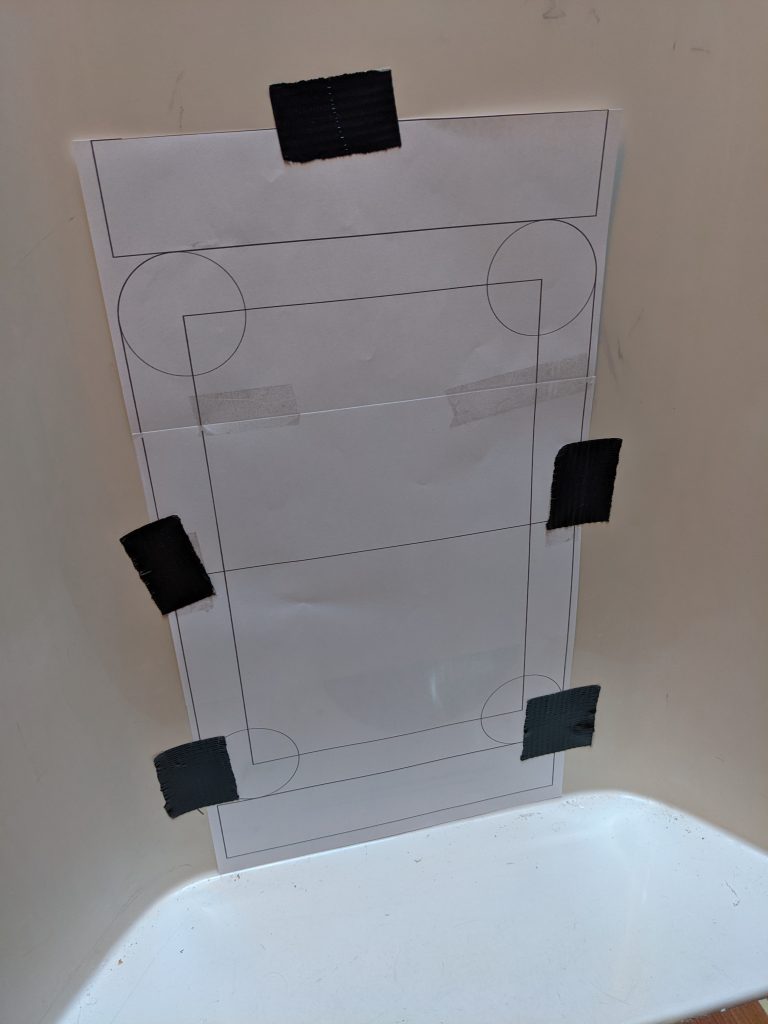
I spent about an hour trying to mark the centers of the holes on the bulkhead, but I could see that I didn’t have them right. I went home and fired up my trusted desktop computer. I drew the hole in Coreldraw (AutoCAD was also available) Any vector drawing program with precise dimensions would work.
I printed it on two sheets of paper and taped them together, then went back to the boat and taped it in place:
Then I used a small drill to marked the centers of the corner circles. The 2″ diameter hole saw (1″ radius) was next used to cut the corners about half depth. I didn’t want to cut all the way though until the last step.
With corners thus marked perfectly, I set about making a fence to guide the Rotozip. I should mention here that the standard spiral blade that comes with the saw is USELESS in fiberglass. It cuts very slowly and overheats immediately. Use a carbide tile-cutting bit instead. That cuts at a good speed and doesn’t overheat.
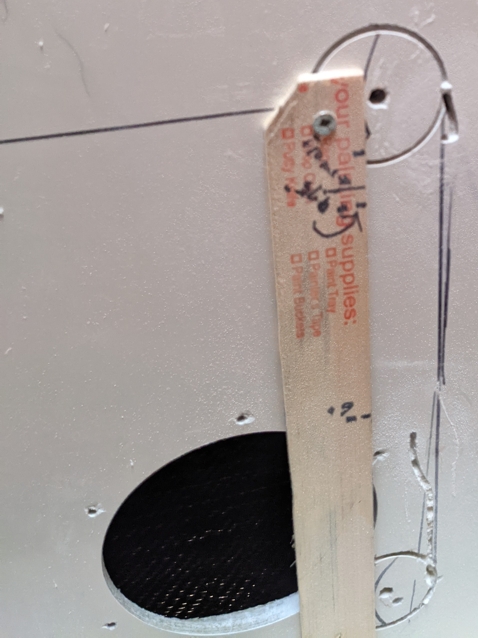
My first attempt at a fence was made of a wooden paint stirrer about 1/4″(6 mm) thick. It wasn’t a success. The saw jumped over the edge. I might have been more successful if I had a steadier hand.
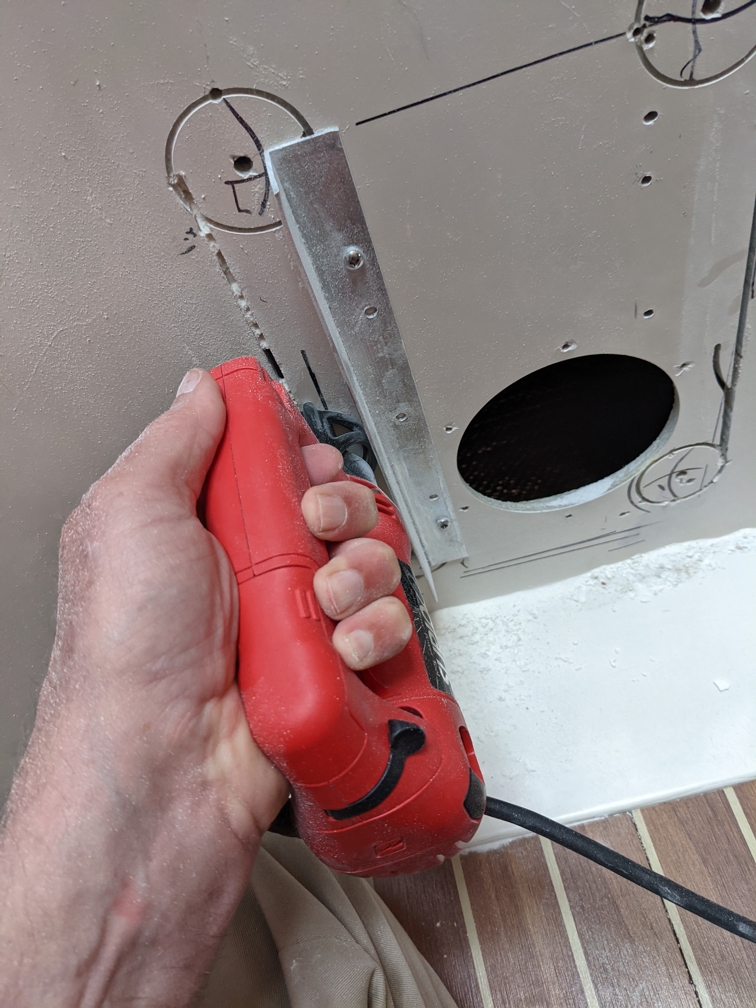
So, I went to the hardware store and bought a couple of feet of aluminum angle, about 25mm or 1″ on each leg. I went home tp cut it with a hacksaw, which I was unable to find. Back to the hardware store to buy one. By now you can see how this project stretched over three days. After cutting to length, I used my drill press to make a few mounting holes for the fences.
The next morning I got back to work. I The aluminum fences worked well, and I finished the straight cuts in about an hour. It was only a couple of minutes work to complete the job by using the holesaw.
Now the only thing left to do is clean up the mess. The Rotozip kicks up a lot of dust. Wear safety glasses and a facemask (the Covid mask I had in my pocket did the job!).
Please comment if you have a better way of doing this!